##### List VM with ISO File Attached
Get-VM | ? { $_ | Get-CDDrive| ? { $_.ConnectionState.Connected -eq "true" -and $_.ISOPath -like "*.ISO*"} }  |
Select Name, @{Name=".ISO Path";Expression={(Get-CDDrive $_).isopath }} | Export-Csv C:\Temp\ISOAttached.csv -NoTypeInformation
Category: Virtual Machine
Snapshot removal error – A general system error occurred: Fault cause: vim.fault.GenericVmConfigFault
We had a virtual machine where there were old snapshots and we were unable to delete the snapshots. It was giving error “A general system error occurred: Fault cause: vim.fault.GenericVmConfigFault”
To resolve this below steps were taken.
- login to ESXi host through PUTTY.
- Browse to virtual machine directory.
- Here we found there were multiple snapshot files with extension vmsd and vmsn files.
- We created a tmp directory and moved all these files to the tmp directory.
- Next step will be to reload the virtual machine configuration file using below commands.
- vim-cmd vmsvc/getallvms | grep -i <vmname>
- vim-cmd vmsvc/reload <vmid>
All the above steps are online and no downtime is required for the VM. Once the VM is reloaded you will get VM consolidation alarm on the vCenter, just consolidate the VM to clear all the snapshots.
Thanks for reading……
Simple script to power ON multiple VM’s in VMware using PowerCLI.
This script will check list of servers from the Powerstat.txt file and will PowerON VM’s that are in PoweredOFF state.
No action will be taken for PoweredON VM’s.
#Import VMware moduld
Get-Module -Name VMware* -ListAvailable | Import-Module

$file = "C:\Powerstat.txt"
$vms = Get-Content $file
Connect-VIServer <vCenter IP> -User 'domain\account' -Password 'XXXXXXXX'
Get-VM $vms | where {$_.Powerstate -eq "poweredOff"} | Start-VM -Runasync -Confirm:$false | Out-Null
Disconnect-VIServer -Confirm:$false
Simple script to Ping multiple servers and get report on Mail
Below is simple script to get ping report on Email.
$Computername = Get-Content "C:\ServerList.txt"

$report1= @()
foreach ($server in $computername){
$temp1 = "" | select Server, PingStatus
if ( Test-Connection -ComputerName $server -Count 1 -ErrorAction SilentlyContinue ) {
$temp1.pingstatus = "Pinging"
}
else {
$temp1.pingstatus = "Not pinging"
}
$temp1.server = $server
$report1+=$temp1
}

$b = $report1 | select Server, PingStatus  | ConvertTo-HTML -Fragment -As Table -PreContent "<h2>Host/iDRAC Availability</h2>" | foreach {if($_ -like "*<td>Not Pinging</td>*"){$_ -replace "<tr>", "<tr bgcolor=red>"}else{$_}} | Out-String

$head = @'
<style>
body { background-color:#FFFFFF;
       font-family:calibri;
       font-size:11pt; }
td, th { border:1px solid gray;
         border-collapse:collapse; }
th { color:white;
     background-color:gray; }
table, tr, td, th { padding: 2px; margin: 0px }
table { margin-left:50px; }
</style>
'@

$finalout = ConvertTo-HTML -head $head -PostContent $b -Body "<h1>ESXi Host/iDRAC Availability</h1>" | Out-String

$MessageContent = $finalout
$MessageContent+= @"
<br><Font face="calibri">Regards,<br /><br />
<font size="4"><b>VMware Administrator</b></font><br />
Technology Services<br /><br />
</p>
</font>
"@

$emailFrom = "Ping Check <HostPingCheck@domain.com>"
$emailTo = "targetmailid@domain.com"

$smtpserver= "10.XX.XX.XX"
$smtp=new-object Net.Mail.SmtpClient($smtpServer)

$msg = new-object Net.Mail.MailMessage
$msg.From = $emailFrom
$msg.To.Add($emailTo)
$msg.IsBodyHTML = $true
$msg.subject="Ping Health Check Report"
$msg.Body = $MessageContent
$smtp.Send($msg)
VMware converter Error: An error occurred while opening a virtual disk…..
An error occurred while opening a virtual disk. Verify that the converter server and the running source machines have a network access to the source destination ESX/Esxi hosts
We had a task of converting a legacy Windows 2003 physical server to virtual machine, we started the task with restarting the server and then installing VMware Standalone Converter.
After selecting all the options carefully, we selected a particular host ESXi host for conversion even though we had 4 ESXi hosts in the cluster.
Once we clicked the finish button, we saw VM creation task in vCenter and then immediately we say VM deletion task, the VMware Converter gave error ” An error occurred while opening a virtual disk. Verify that the converter server and the running source machines have a network access to the source destination ESX/Esxi hosts“
After going through all the posts on the internet we figured out the issue was with DNS, so we created host entry for that particular host which we had selected during the P2V wizard and re-ran the task, again the task failed with same error.
This time we observed tasks in vCenter and found the VMware converter was selecting randomly any host from the cluster even though we had specified a particular host for conversion.
So we decided to create DNS entries for all the hosts in the cluster and then ran the P2V task again.
This time it ran successfully without any issues……..!!!!!!!!!!!
How to add the host entry in Windows
Click start > All Programs > Accessories> Notepad.
Click File > Open. In the filename field type this path :- “C:\Windows\System32\drivers\etc\hosts”
Click Open.
Point your ESXi and Vcenter hostname with IP address
Example
192.168.21.201 ESX-01.domain
192.168.21.202 ESX-02.domain
192.168.21.203 ESX-03.domain
192.168.21.204 ESX-04.domain
Make the necessary changes to the file.
Click File > Save to save your changes.
Script to get VM Snapshot Report on Mail
Here is a simple script to get VM’s with snapshot on your email, you can schedule it to get daily reports at specified time.
Below is the Script:
################## Snapshot Report ##################
#Import VMware moduld
Get-Module -Name VMware* -ListAvailable | Import-Module

#Connect to our vCenter Server using the logged in credentials
Connect-VIServer <IP Address> -User '<Account>' -Password '<Password>'

$Snapshots = Get-VM | Get-Snapshot | select Description,Created,VM,SizeMB,SizeGB |  Sort-Object -Property Name

function Get-SnapshotSize ($Snapshot)
{
    if ($snapshot.SizeGB -ge "1")
    {
        $Snapshotsize = [string]([math]::Round($snapshot.SizeGB,3)) + " GB"
        }
        else {
        $Snapshotsize = [string]([math]::Round($snapshot.SizeMB,3)) + " MB"
        }
   Return $Snapshotsize
}

function set-SnapshotDate ($snapshot)
{
	$RedValue = (get-date).AddDays(-14)
    $greenValue = (get-date).AddDays(-7)

    if ($snapshot.created -gt $greenValue)
        {
            $backgroundcolor = "green"
        }
    elseif ($snapshot.Created -lt $greenValue -and $snapshot.Created -gt $RedValue)
        {
            $backgroundcolor = "yellow"
        }
    else
        {
        $backgroundcolor = "red"
        }
    return $backgroundcolor
}

function Format-HTMLBody ($body)
{
    $newbody = @()
    foreach ($line in $body)
    {
        ## Remove the Format Header
        if ($line -like "*<th>Format</th>*")
            {
                $line = $line -replace '<th>Format</th>',''
            }
        ## Format all the Red rows
        if ($line -like "*<td>red</td>*")
            {
                $line = $line -replace '<td>red</td>',''
                $line = $line -replace '<tr>','<tr style="background-color:Tomato;">'
            }
        ## Formating all the Yellow Rows
        elseif ($line -like "*<td>yellow</td>*")
            {
                $line = $line -replace '<td>yellow</td>',''
                $line = $line -replace '<tr>','<tr style="background-color:Orange;">'
            }
        ## Formating all the Green Rows
        elseif ($line -like "*<td>green</td>*")
            {
                $line = $line -replace '<td>green</td>',''
                $line = $line -replace '<tr>','<tr style="background-color:MediumSeaGreen;">'
            }
        ## Building the new HTML file
            $newbody += $line
    }
    return $newbody
}
$date = (get-date -Format d/M/yyyy)

$header = @"
<style>
TABLE {border-width: 1px; border-style: solid; border-color: black; border-collapse: collapse;}
TH {border-width: 1px; padding: 3px; border-style: solid; border-color: black; background-color: black;}
TD {border-width: 1px; padding: 3px; border-style: solid; border-color: black;}

body {   font-family: Calibri,Candara,Segoe,Segoe UI,Optima,Arial,sans-serif;
         font-size: 14px;
         line-height: 10px;
         font-weight: 400;
         color: black;
    }
</style>
"@
$PreContent = "<H1> Virtual Machines with Snapshots </H1>"
$html = $Snapshots | select VM,Created,@{Label="Size";Expression={Get-SnapshotSize($_)}},Description,@{Label="Format";Expression={set-SnapshotDate($_)}}| sort Created -Descending | ConvertTo-Html -Head $header -PreContent $PreContent
$Report = Format-HTMLBody ($html)
$MessageContent = ("$Report")
$MessageContent+= @"
<br><Font face="calibri">Regards,<br /><br />
<font size="4"><b>VMware Team</b></font><br />
<br>Technology Team<br />
</font>
"@

## MailParam
$MailParam = @{
    To         = "email@domain.com"
    From       = "email@domain.com"
    SmtpServer = "<IP Address>"
    Subject    = "VMware Snapshot Report for " + (get-date -Format d/M/yyyy)
    body       = (" $MessageContent ")
}
## Sending the Email
Send-MailMessage @MailParam -BodyAsHtml

#DissConnect from our vCenter Server
disconnect-viserver -confirm:$false
How MAC address are generated for VM’s?
Have you ever wondered how vCenter assigns MAC addresses to VM’s, let us understand it.
A MAC address is generated for a vNIC when the VM is powered-on. The generated address will remain static unless there is a MAC address conflict in the environment.
vSphere 5.1 and later provides several schemes for automatic allocation of MAC addresses in vCenter Server. You can select the scheme that best suits your requirements for MAC address duplication, OUI requirements for locally administered or universally administered addresses, and so on.
The following schemes of MAC address generation are available in vCenter Server:
- VMware OUI allocation, default allocation
- Prefix-based allocation
- Range-based allocation
After the MAC address is generated, it does not change unless the virtual machine’s MAC address conflicts with that of another registered virtual machine. The MAC address is saved in the configuration file of the virtual machine.
VMware Organizationally Unique Identifier (OUI) allocation assigns MAC addresses based on the default VMware OUI 00:50:56 and the vCenter Server ID.
According to the VMware OUI allocation scheme, a MAC address has the format 00:50:56:XX:YY:ZZ where 00:50:56 represents the VMware OUI, XX is calculated as (128 + vCenter Server ID), and YY and ZZ are random two-digit hexadecimal numbers.
The 4th octet of VM MAC address calculated as below:
4th Octet of MAC: (128 + vCenter Instance ID) convert it to Hexadecimal.
To get vCenter Instance ID
- Log in to vCenter Server using the vSphere Client, go to the Hosts and Clustersview
- Click the Configure
- Under Settings, click General.
- In the vCenter Server Settings dialog box, expand Runtime Settings.
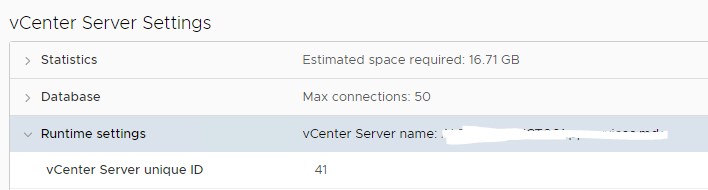
So my vCenter ID is 41.
Now let us calculate a MAC address for a VM
First three Octet will be 00:50:56
4th Octet of MAC = (128 + vCenter instance Id)
i.e. = 128+41 = 169
Now if you convert 169 to a Hexadecimal value it converts to “a9”
So now let’s confirm the MAC address of a VM in my vCenter, 4th Octet is assigned as “a9”

Thanks for Reading…!!!!!
CPU co-stop counter measure (%CSTP)
In most of the vSphere documentation, CPU Ready is mentioned as the indicator that either the host is constrained by cpu resources, or the vm is limited. But this counter only measures how long the vm has to wait for a single vcpu. Another useful counter is the co-stop figure.
As the esxtop documentation states, Co-Stop – Amount of time a SMP virtual machine was ready to run, but incurred delay due to co-vCPU scheduling contention.
So this figure has no meaning for a single vcpu vm, and in fact if you display this it will be zero. However in a multi-vcpu vm, the figure will indicate either the amount of additional time beyond the first vcpu being available available until subsequent vcpus are ready for the vm to run, or any time the vcpu is stopped as a result of the relaxed co-scheduling process.
The fact that co-stop is indicated is potentially bad from a performance perspective. As Duncun Epping states in his blog on esxlog (Yellow-Bricks), if the value is above 3 then there is excessive usage of vSMP, and you should decrease amount of vCPUs for this particular VM, which should lead to increased scheduling opportunities.
| Display | Metric | Threshold | Explanation |
| CPU | %CSTP | 3 | Excessive usage of vSMP. Decrease amount of vCPUs for this particular VM. This should lead to increased scheduling opportunities. |
ESXi CPU Considerations
This article provides guidance regarding CPU considerations in VMware ESXi.
CPU virtualization adds varying amounts of overhead depending on the percentage of the virtual machine’s workload that can be executed on the physical processor as is and the cost of virtualizing the remainder of the workload:
For many workloads, CPU virtualization adds only a very small amount of overhead, resulting in performance essentially comparable to native.
Many workloads to which CPU virtualization does add overhead are not CPU-bound—that is, most of their time is spent waiting for external events such as user interaction, device input, or data retrieval, rather than executing instructions. Because otherwise-unused CPU cycles are available to absorb the virtualization overhead, these workloads will typically have throughput similar to native, but potentially with a slight increase in latency.
For a small percentage of workloads, for which CPU virtualization adds overhead and which are CPU-bound, there might be a noticeable degradation in both throughput and latency. The rest of this subsection lists practices and configurations recommended by VMware for optimal CPU performance.
In most environments ESXi allows significant levels of CPU overcommitment (that is, running more vCPUs on a host than the total number of physical processor cores in that host) without impacting virtual machine performance. If an ESXi host becomes CPU saturated (that is, the virtual machines and other loads on the host demand all the CPU resources the host has), latency-sensitive workloads might not perform well. In this case you might want to reduce the CPU load, for example by powering off some virtual machines or migrating them to a different host (or allowing DRS to migrate them automatically).
It is a good idea to periodically monitor the CPU usage of the host. This can be done through the vSphere Web Client or by using esxtop or resxtop. Below we describe how to interpret esxtop data:
If the load average on the first line of the esxtop CPU panel is equal to or greater than 1, this indicates that the system is overloaded.
The usage percentage for the physical CPUs on the PCPU line can be another indication of a possibly overloaded condition. In general, 80% usage is a reasonable ceiling and 90% should be a warning that the CPUs are approaching an overloaded condition. However organizations will have varying standards regarding the desired load percentage.
Configuring a virtual machine with more virtual CPUs (vCPUs) than its workload can use might cause slightly increased resource usage, potentially impacting performance on very heavily loaded systems. Common examples of this include a single-threaded workload running in a multiple-vCPU virtual machine or a multi-threaded workload in a virtual machine with more vCPUs than the workload can effectively use.
Even if the guest operating system doesn’t use some of its vCPUs, configuring virtual machines with those vCPUs still imposes some small resource requirements on ESXi that translate to real CPU consumption on the host. For example:
Unused vCPUs still consume timer interrupts in some guest operating systems. (Though this is not true with “tickless timer” kernels, described in “Guest Operating System CPU Considerations” on page 47.)
Maintaining a consistent memory view among multiple vCPUs can consume additional resources, both in the guest operating system and in ESXi. VMware, Inc. 21
Chapter 2 ESXi and Virtual Machines
Most guest operating systems execute an idle loop during periods of inactivity. Within this loop, most of these guest operating systems halt by executing the HLT or MWAIT instructions. Some older guest operating systems (including Windows 2000 (with certain HALs), Solaris 8 and 9, and MS-DOS), however, use busy-waiting within their idle loops. This results in the consumption of resources that might otherwise be available for other uses (other virtual machines, the VMkernel, and so on). ESXi automatically detects these loops and de-schedules the idle vCPU. Though this reduces the CPU overhead, it can also reduce the performance of some I/O-heavy workloads. For additional information see VMware KB articles 1077 and 2231.
The guest operating system’s scheduler might migrate a single-threaded workload amongst multiple vCPUs, thereby losing cache locality. These resource requirements translate to real CPU consumption on the host.
Some workloads can easily be split across multiple virtual machines. In some cases, for the same number of vCPUs, more smaller virtual machines (sometimes called “scaling out”) will provide better performance than fewer larger virtual machines (sometimes called “scaling up”). In other cases the opposite is true, and fewer larger virtual machines will perform better. The variations can be due to a number of factors, including NUMA node sizes, CPU cache locality, and workload implementation details. The best choice can be determined through experimentation using your specific workload in your environment.
Determining an Appropriate vCPU-to-pCPU Ratio
In a virtual machine, processors are referred to as virtual CPUs or vCPUs. When the vSphere administrator adds vCPUs to a virtual machine, each of those vCPUs is assigned to a physical CPU (pCPU), although the actual pCPU might not always be the same. There must always be enough pCPUs available to support the number of vCPUs assigned to a single virtual machine or the virtual machine will not boot.
However, one of the major advantages of vSphere virtualization is the ability to oversubscribe, so there is of course no 1:1 ratio between the number of vCPUs that can be assigned to virtual machines and the number of physical CPUs in the host. For vSphere 6.0, there is a maximum of 32 vCPUs per physical core, and vSphere administrators can allocate up to 4,096 vCPUs to virtual machines on a single host, although the actual achievable number of vCPUs per core depends on the workload and specifics of the hardware.
For every workload beyond a 1:1 vCPU to pCPU ratio to get processor time, the vSphere hypervisor must invoke processor scheduling to distribute processor time to virtual machines that need it. Therefore, if the vSphere administrator has created a 5:1 vCPU to pCPU ratio, each processor is supporting five vCPUs. The higher the ratio becomes, the higher the performance impact will be, because you have to account for the length of time that a virtual machine has to wait for physical processors to become available. The metric that is by far the most useful when looking at CPU oversubscription, and when determining how long virtual machines have to wait for processor time, is CPU Ready.
The vCPU-to-pCPU ratio to aim to achieve in your design depends upon the application you are virtualizing. In the absence of any empirical data, which is generally the case on a heterogeneous cloud platform, it is a good practice, through the use of templates and blueprints, to encourage your service consumers to start with a single vCPU and scale out when it is necessary. While multiple vCPUs are great for workloads that support parallelization, this is counterproductive in the case for applications that do not have built in multi-threaded structures. Therefore, while a virtual machine with 4 vCPUs will require the hypervisor to wait for 4 pCPUs to become available, on a particularly busy ESXi host with other virtual machines, this could take significantly longer than if the VM in question only had a single vCPU. This performance impact is further extended as the vSphere ESXi scheduling mechanism prefers to use the same vCPU-to-pCPU mapping to boost performance through CPU caching on the socket.
Service providers must, where possible, try to educate their consumers on provisioning virtual machines with the correct resources, rather than indiscriminately following physical server specifications that software vendors often refer to in their documentation. In the event that they have no explicate requirements, advise the consumer to start with a single vCPU if possible, and then scale up once they have the metric information on which to base an informed decision.
So that the vCPU-to-pCPU ratio is optimized and you are able to take full advantage of the benefits of over provisioning, in an ideal world you would first engage in dialog with the consumers and application owners to understand the application’s workload prior to allocating virtual machine resources. However, in the world of shared platform and multitenant cloud computing, where this is unlikely to be the case, and the application workload will be unknown, it is critical to not overprovision virtual CPUs, and scale out only when it becomes necessary. Employing VMware vRealize Operations™ as a monitoring platform that can trend historical performance data and identify virtual machines with complex or mixed workloads is highly beneficial and its capacity planning functionality assists in determining when to add pCPUs. CPU Ready Time is the key metric to consider as well as CPU utilization. Correlating this with memory and network statistics, as well as SAN I/O and disk I/O metrics, enables the service provider to proactively avoid any bottlenecks and correctly size the VMware Cloud Provider Program platform to avoid performance penalizing or overprovisioning.
The actual achievable ratio in a specific environment depends on a number of factors:
•The vSphere version – The vSphere CPU scheduler is always being improved. The newer the version of vSphere, the more consolidation is possible.
•Processor age – Newer processors are much more robust than older ones. With newer processors, service providers should be able to achieve higher vCPU:pCPU ratios.
•Workload type – Different kinds of workloads on the host platform will result in different ratios.
•As a guideline, the following vCPU:pCPU ratios can be considered a good starting point for a design:
- 1:1 to 3:1 is not typically an issue
- With 3:1 to 5:1, you might begin to see performance degradation
- 6:1 or greater is often going to cause a significant problem for VM performance
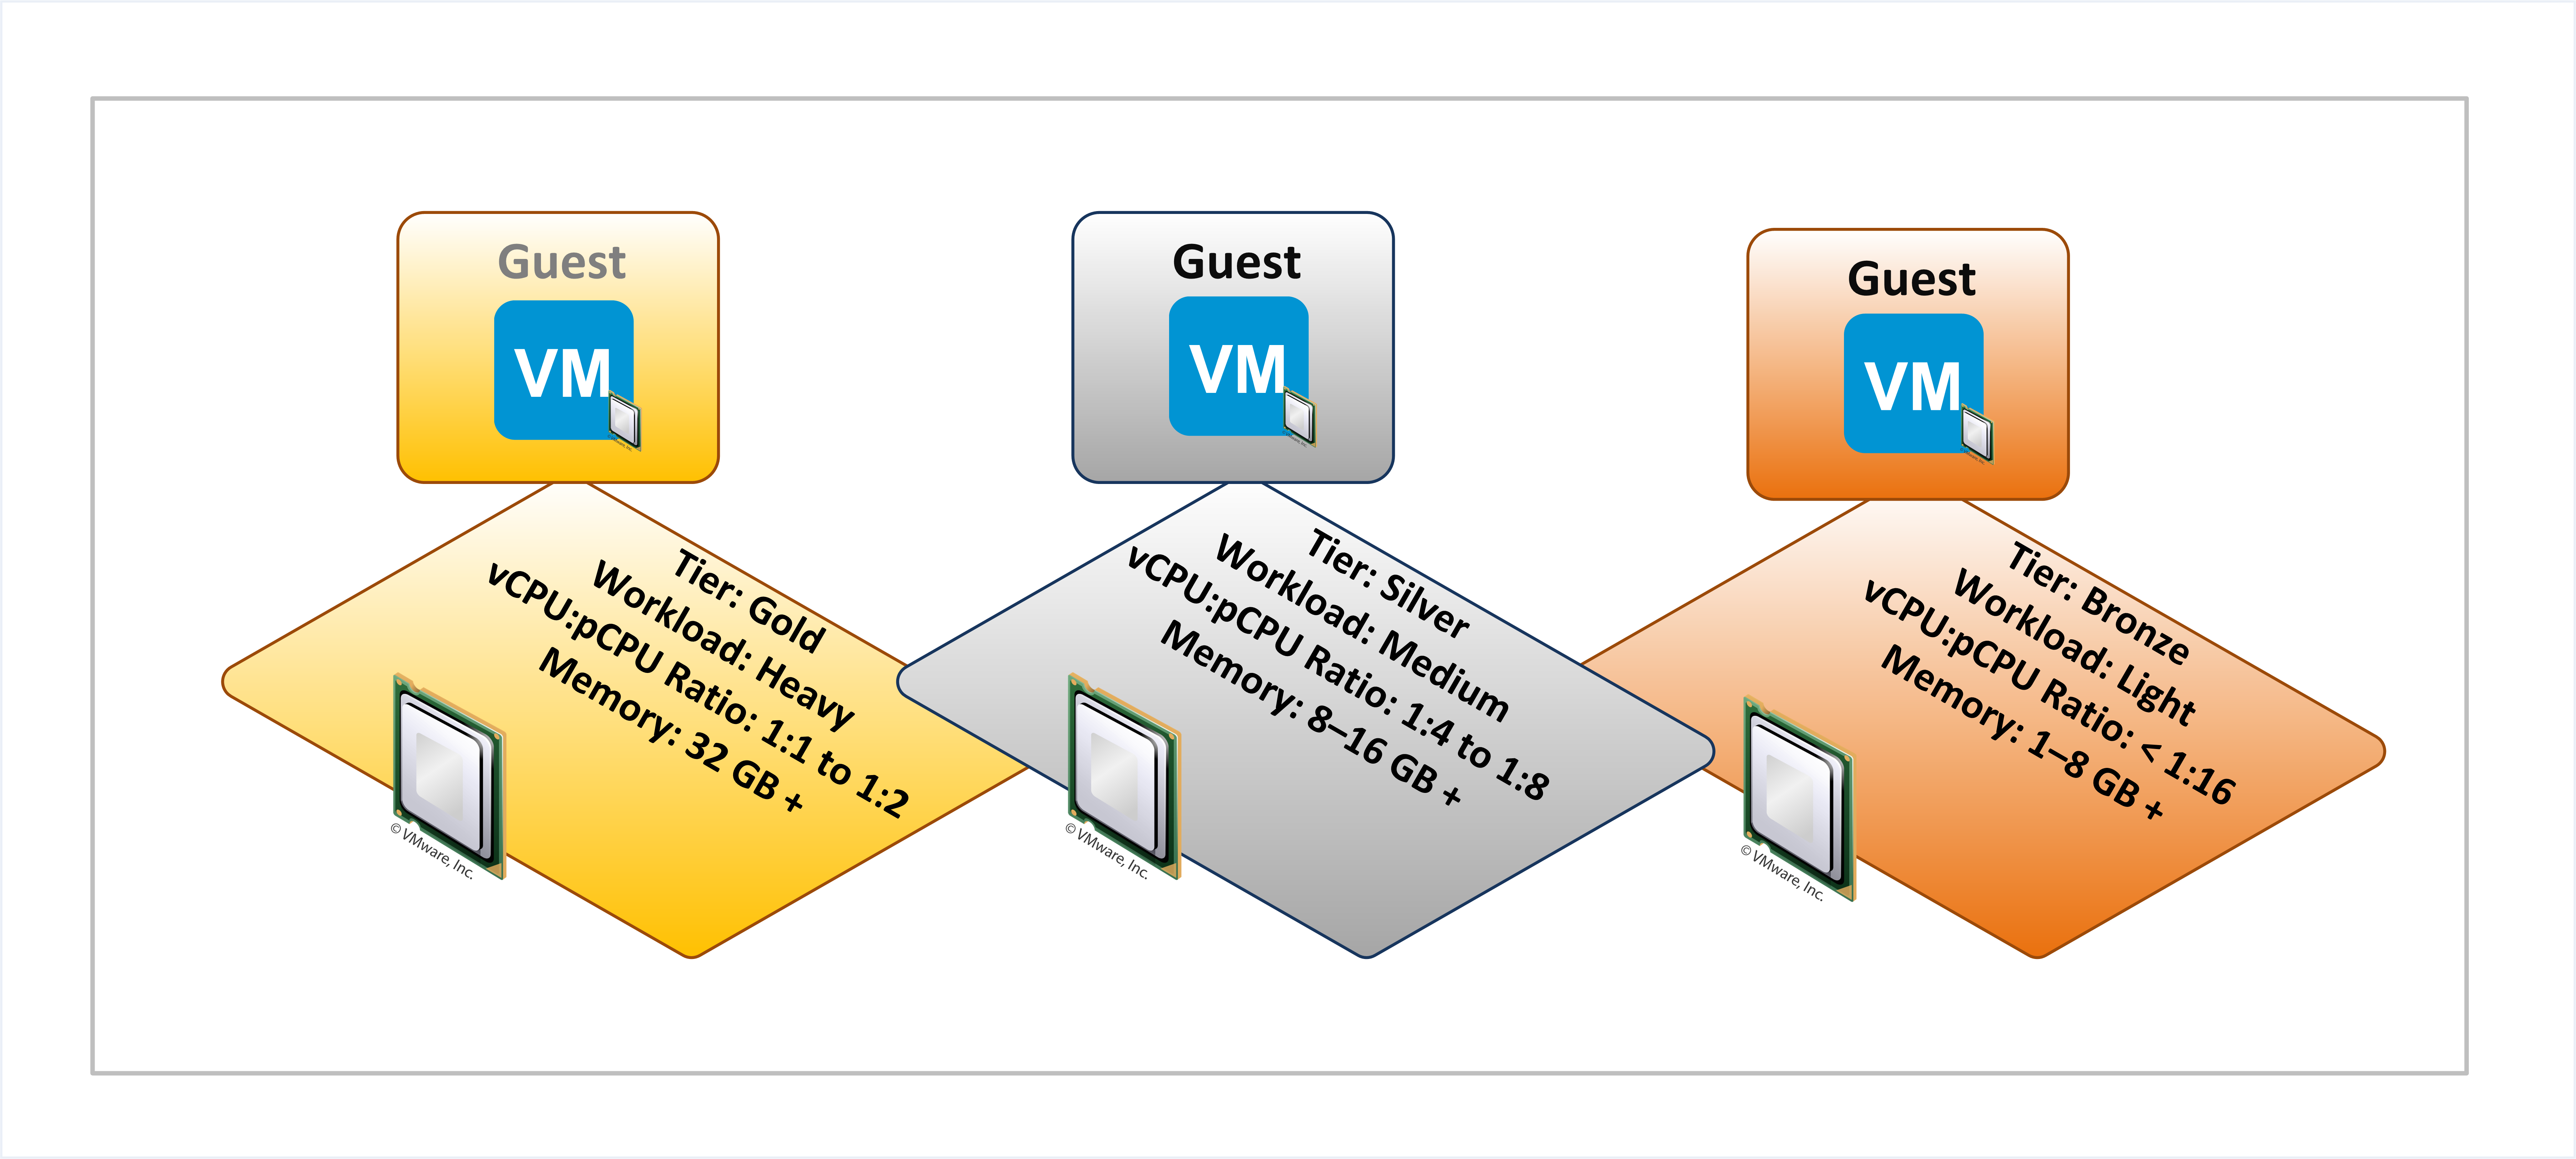
The use of vCPU-to-pCPU ratios can also form part of a tiered service offering. For instance, offering lower CPU consolidation ratios on higher tiers of service or the reverse. Use the following figure as a starting point to calculate consolidation ratios in a VMware Cloud Provider Program design, but remember for every single rule there are exceptions and calculating specific requirements for your tenants is key to a successful architecture. This figure is for initial guidance only.
Figure: Virtual CPU-to-Physical CPU Ratio
As a general guideline, attempt to keep the CPU Ready metric at 5 percent or below. For most types of platforms, this is considered a good practice.
